#
Active Directory Home Lab with Proxmox - Part 2
In this post, we're diving into the setup of Windows virtual machines (VMs) in a Proxmox home lab, with the ultimate goal of building an Active Directory (AD) environment. This includes creating a Domain Controller that will also serve as the DHCP server for our AD Lab, and joining a Windows 10 host to the domain. By the end of this guide, you'll have a functional AD lab that you can use for learning, experimenting, and testing.
#
What You'll Need
To get started with setting up your Windows VMs and creating the AD Lab, make sure you have the following:
- Windows VirtIO Drivers: Necessary for better performance and compatibility of Windows VMs in Proxmox.
- Windows Server 2022 ISO: For setting up the Domain Controller.
- Windows 10 Enterprise Evaluation ISO: For joining a client machine to the domain.
Note
The ISOs typically have a lifespan of 90 to 180 days, but they can often be extended. To be safe, consider taking a snapshot of your VMs right after installation to revert back if needed.
#
Setting Up the AD Lab
We'll start by uploading the necessary ISOs to our Proxmox server. For this guide, we'll create two VMs: a Windows 10 machine and a Domain Controller. Since the setup for both is quite similar, we'll focus on the Domain Controller.
#
Step 1: Create the Domain Controller VM
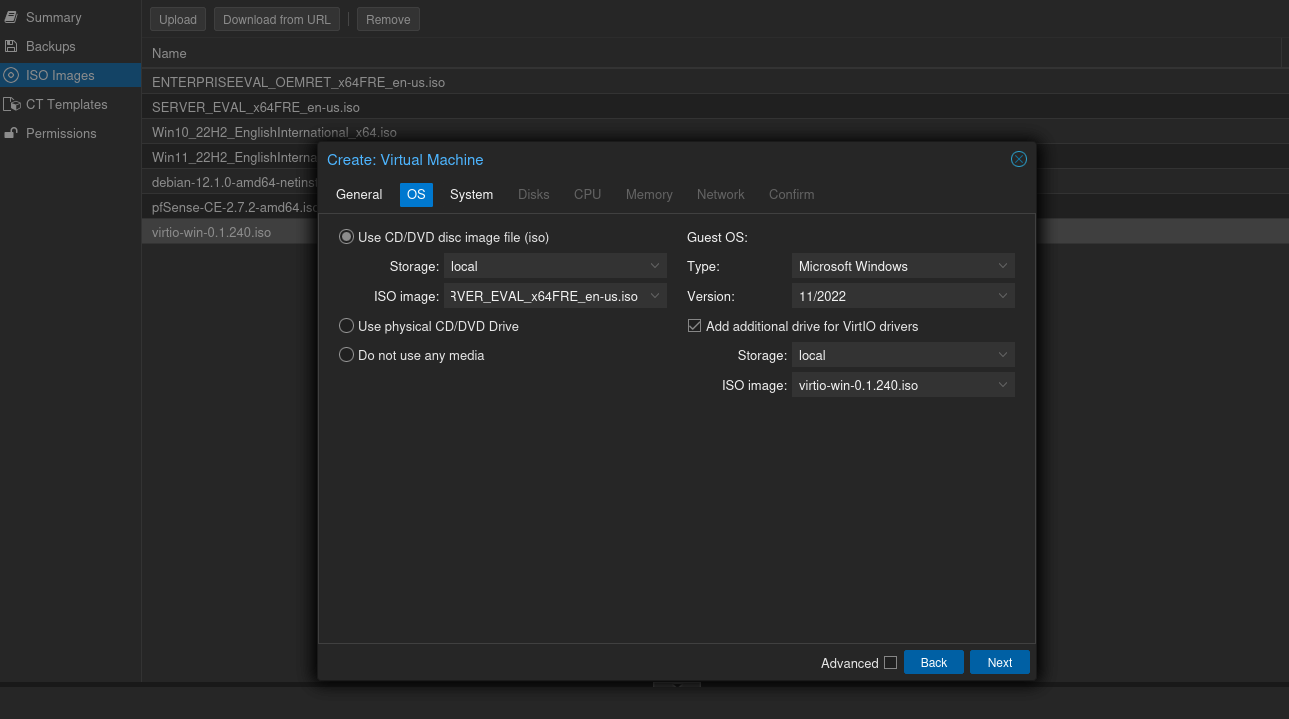
Create a new Virtual Machine and select the Windows Server 2022 ISO image you downloaded. Check the box to add an additional drive for the VirtIO drivers and select the corresponding ISO image.
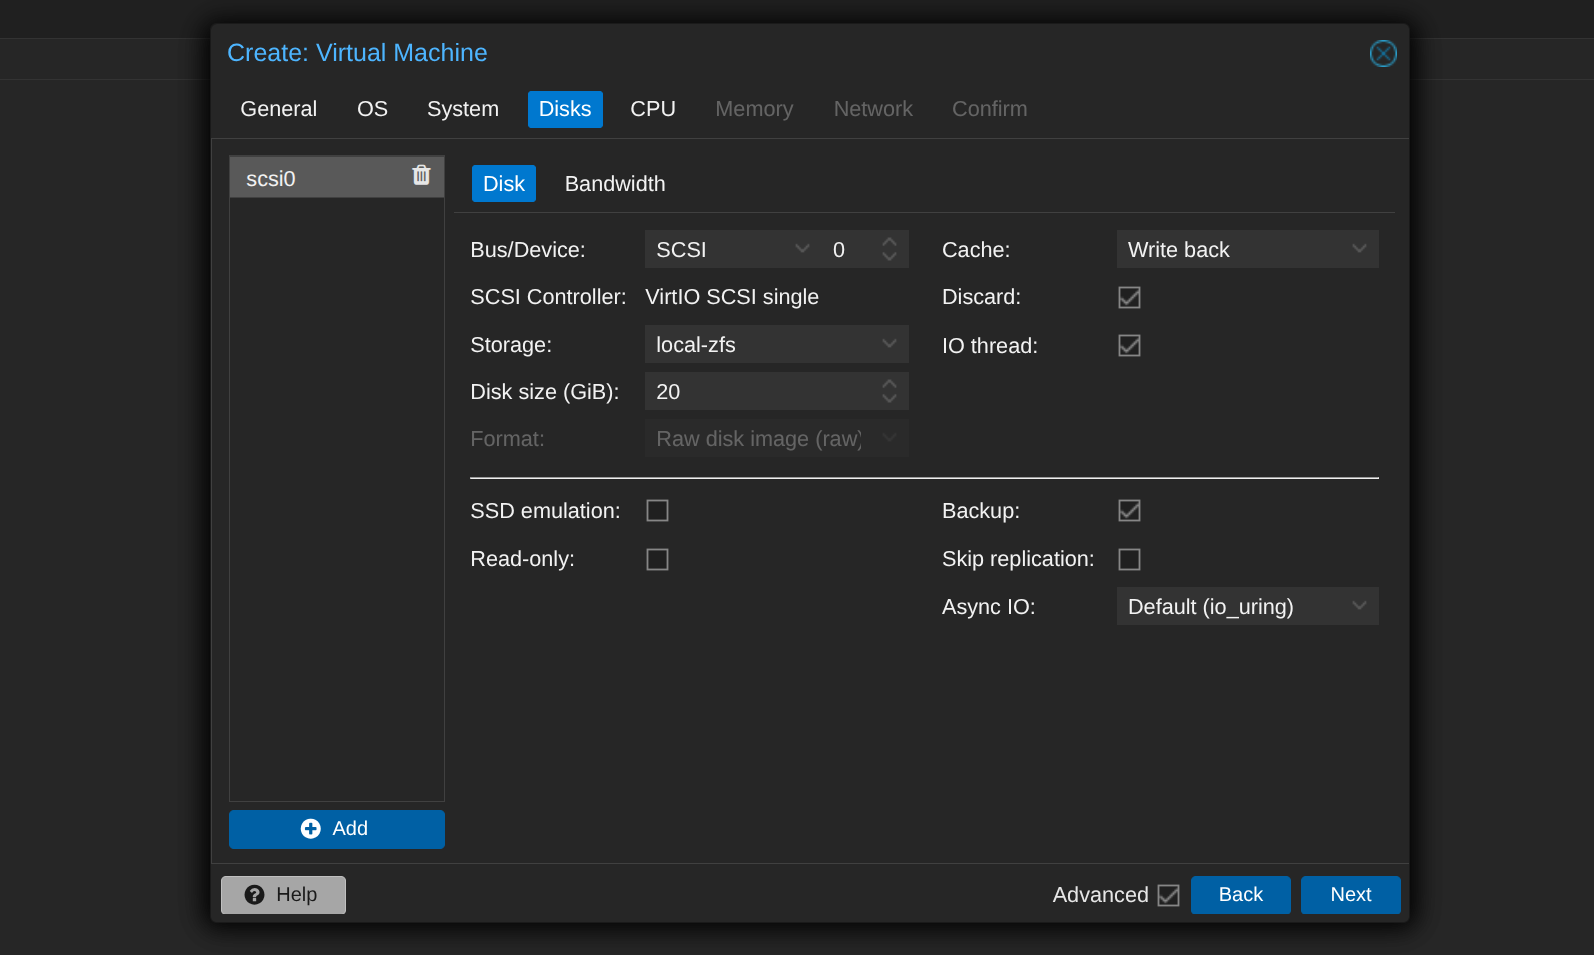
Enable the "Qemu Agent" in the system tab and use the following configuration for the disks.
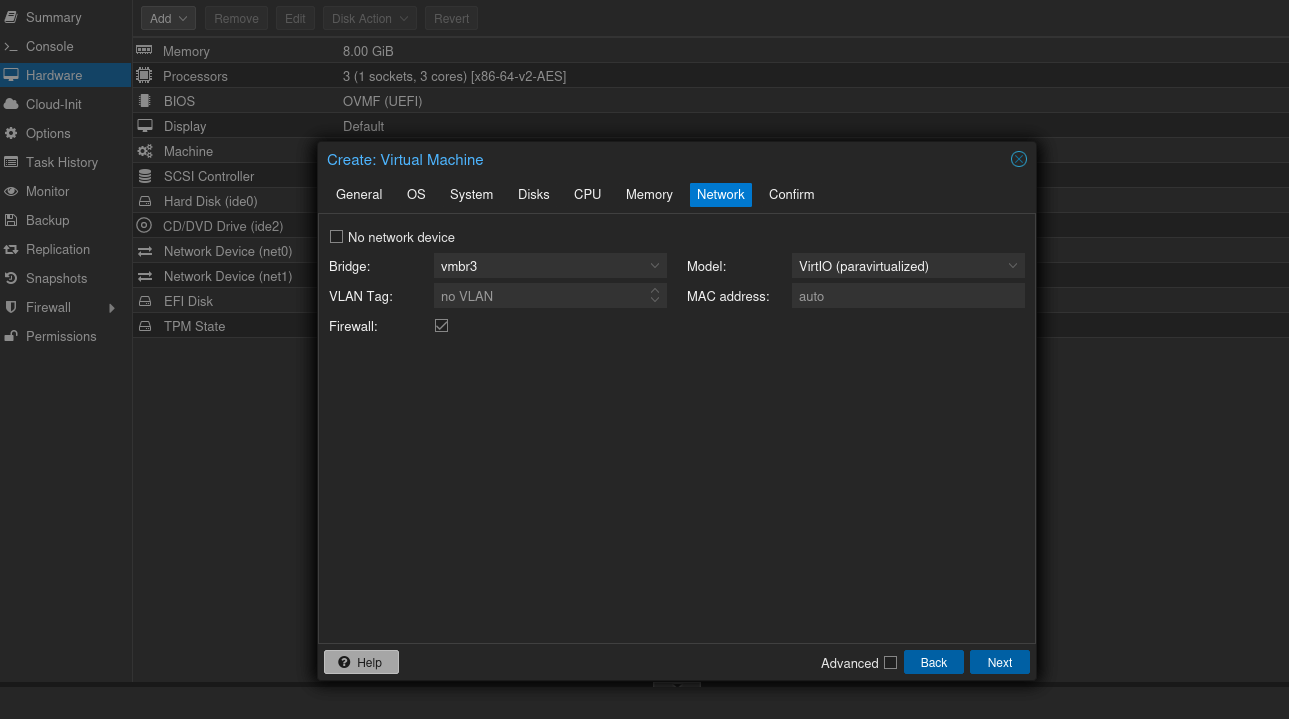
It's recommended to assign at least 8GB of RAM and 2 CPU cores. Skip through the remaining settings, and ensure you select vmbr3 as the network interface bridge (AD LAB).
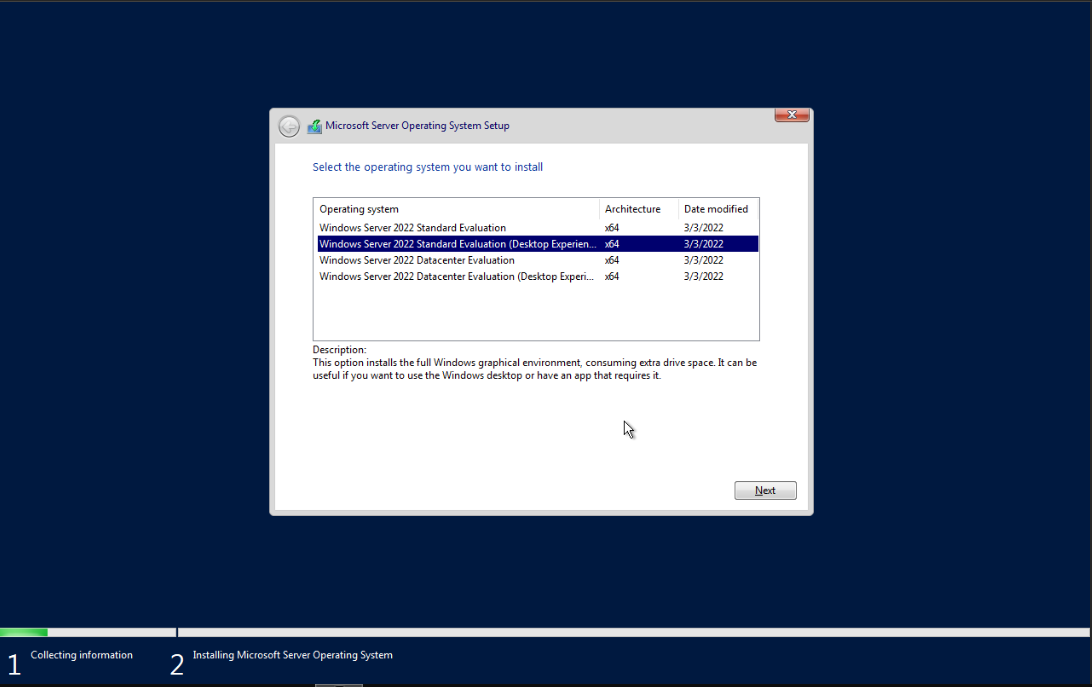
Start the VM and press enter to go into the installation process. Begin the installation process by choosing the Windows Server 2022 Standard Evaluation (Desktop Experience) as the operating system. Proceed with the custom installation.
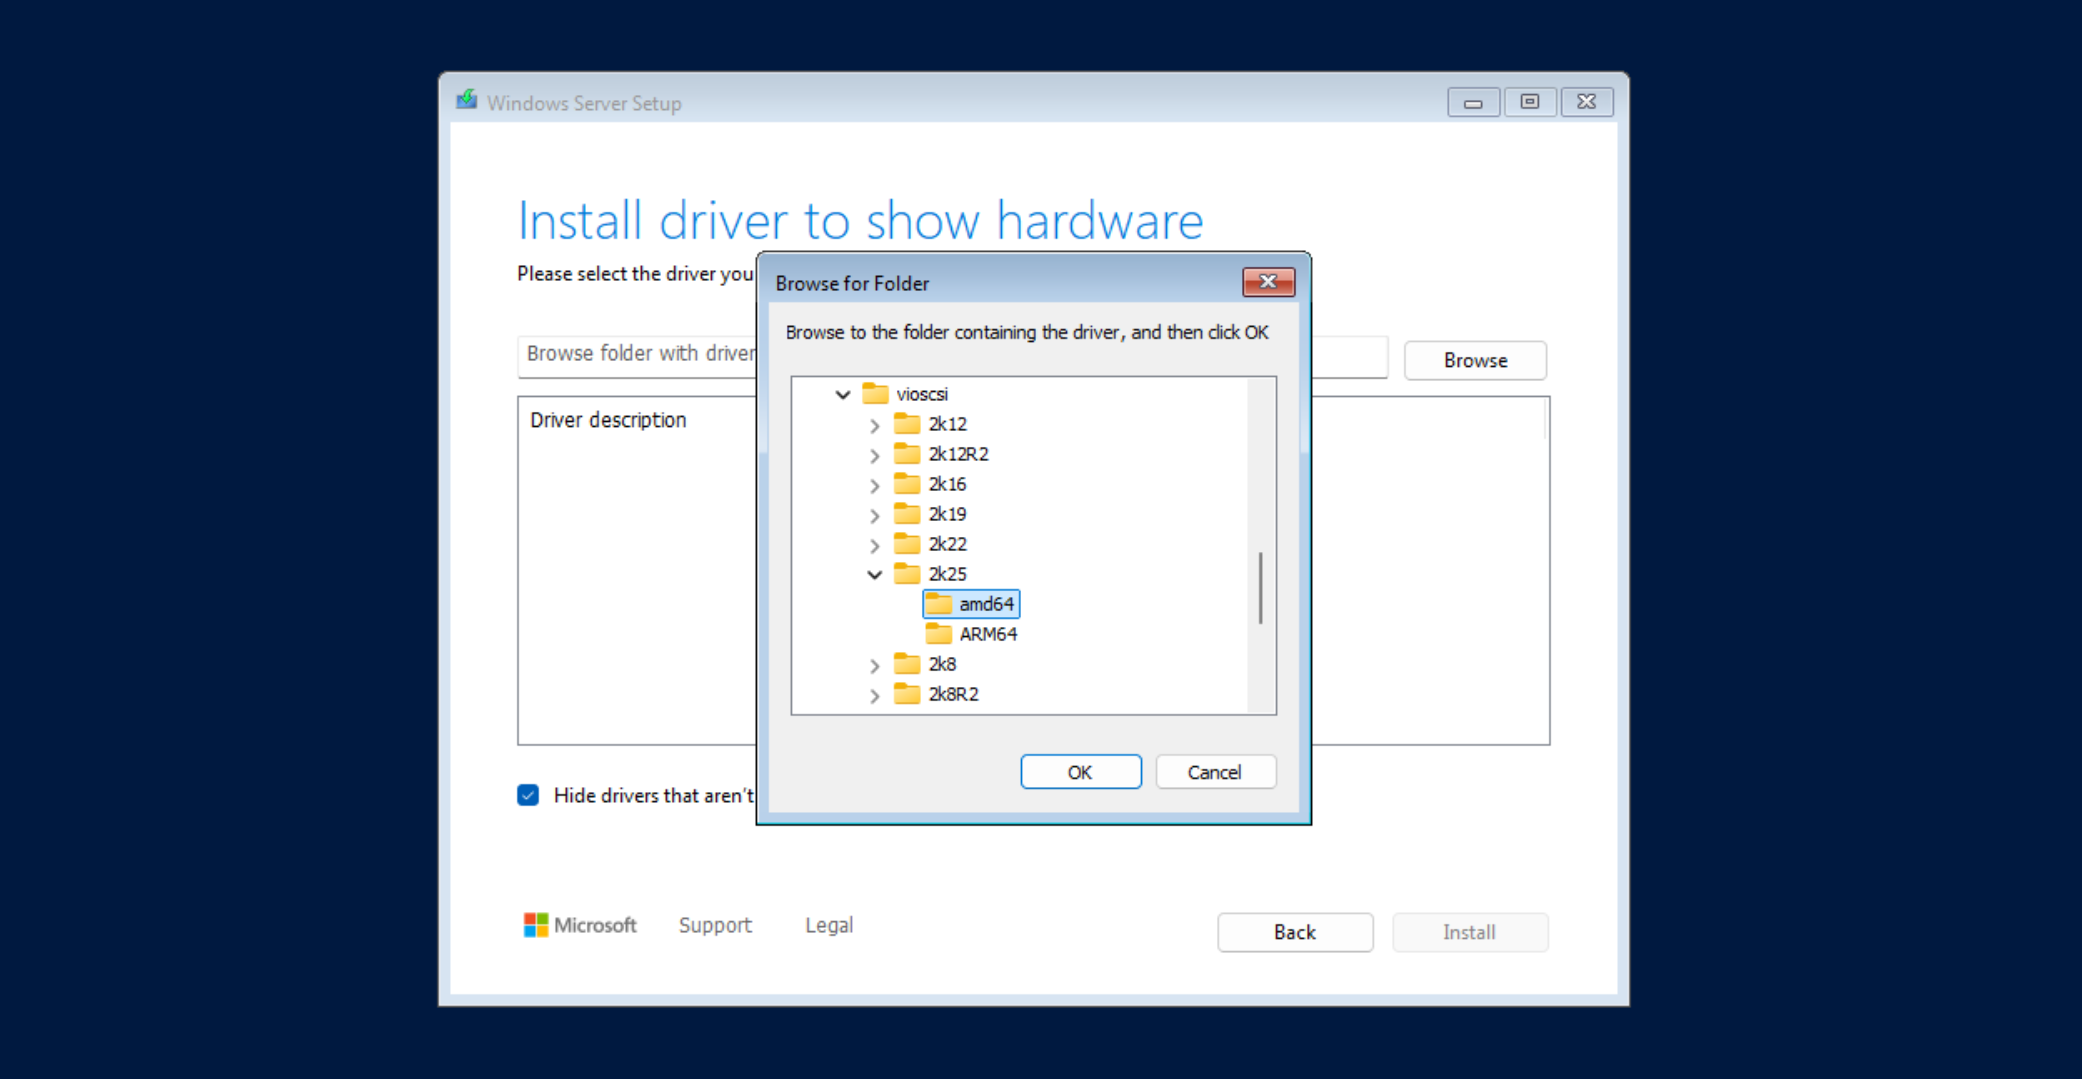
Follow the installer steps until you reach the installation step where you need to select the location to install Windows Server. Click "Load driver" to install the VirtIO drivers for hard disk and the network. Browse to the CD drive where you mounted the VirtIO driver and select folder vioscsi\2k22\amd64 and confirm. Select the "Red Hat VirtIO SCSI pass-through controller" and click next to install it. Repeat this for the NetKVM\2k22\amd64 and Balloon\2k22\amd64 folders.
The first thing to do after the first boot is to rename the computer. Go to Settings > System > About > Rename This PC. I renamed mine to DC01 and chose to restart later.
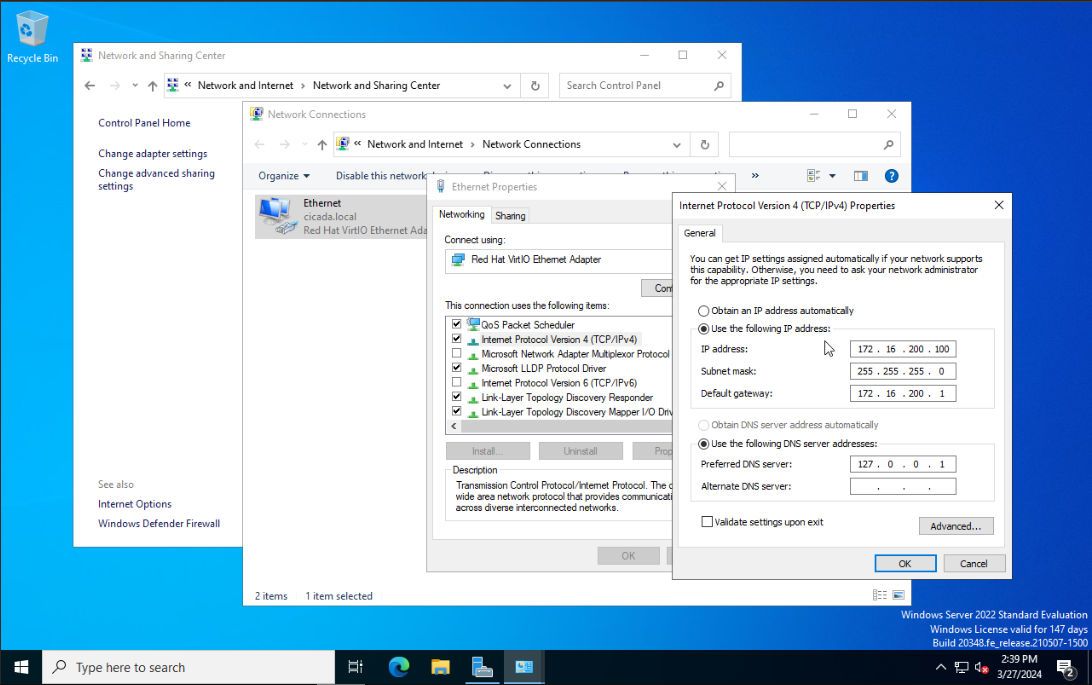
Since this machine will serve as the DHCP server, it needs a static IP. Go to Control Panel > Network and Internet > Network and Sharing Center > Change Adapter Settings, and configure the network interface with a private IP address (e.g., 172.16.200.100). Set the DNS server to 127.0.0.1, since the DC will also be a DNS server.
#
Step 2: Install Active Directory Domain Services
Open Server Manager and select Add roles and features. Accept the default settings until you're prompted with the Server Roles section. Select Active Directory Domain Services and add the necessary features. Once it has installed successfully, select Close. I also installed the DNS and DHCP Server Features together with Active Directory Certificate Services, but this is optional.
The next step is to promote the server to a domain controller. You will need to have the domain name you want to use in the next step. I will choose the domain name of cicada.local. To promote the server to a domain controller, click on the notification icon on the top section of the Server Manager program. Then select Promote this server to a domain controller. Select Add a new forest as this is a newly created AD environment. Enter the domain name in the root domain name field. Once the Windows Server has rebooted, you will see the login screen show the domain entered in the previous step.
#
Step 3: Create a Domain Admin Account
After logging in, open Active Directory Users and Computers. As I like to keep things organized, I will create a new group for all the user accounts. Right click on your domain and select New > Organizational Unit and name it Groups. Move all group related objects from the Users to the Groups folder. Right click on the Users folder and select New > User.
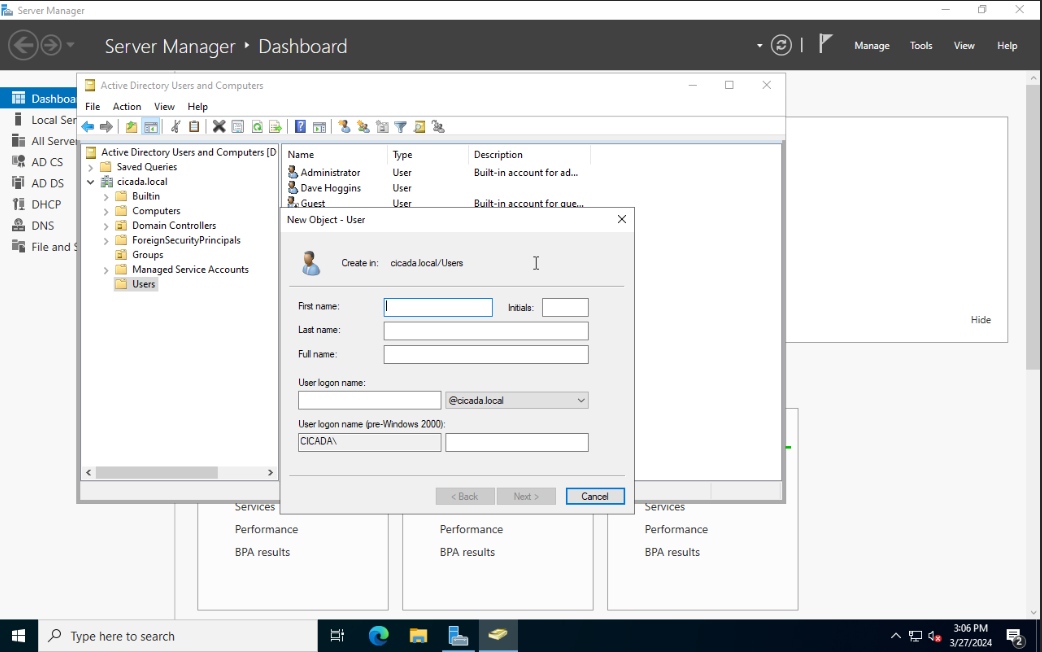
Fill in the user details and set a password for the account. Disable the option User must change password at next logon and check the Password never expires. In an organization, the former should be checked so that the end user can set their own password.
Now we need to add the newly created account to the Domain Admin group. This can be done right clicking the newly created user and selecting Properties. Select the Member of > Add. Under the Enter the object names to select section, click on the Advanced button. Then click Find now > Domain Admins and click OK.
We can then logout of the Administrator account and login with our newly created domain account. Whenever we create a new user account, they are able to login with their credentials on any domain joined host.
#
Step 4: Configure the DHCP Server
Go to Server Manager > Add roles and Features, select DHCP Server, and complete the installation. Once done, complete the DHCP configuration through the notifications in Server Manager.
We then have to configure a DHCP scope. To do so, go to Server Manager once again. Then select Tools > DHCP. Expand the available options and then right click on IPv4 to create an IPv4 Scope. Set a name for the scope and give it a description if you wish to do so. Select Next and set the range to be somewhere inside the 172.16.200.1/24 network. I choose the starting IP to be 172.16.200.11 to give me some room in case I want to add some static IPs later. You can also exclude some IP addresses if you want to.
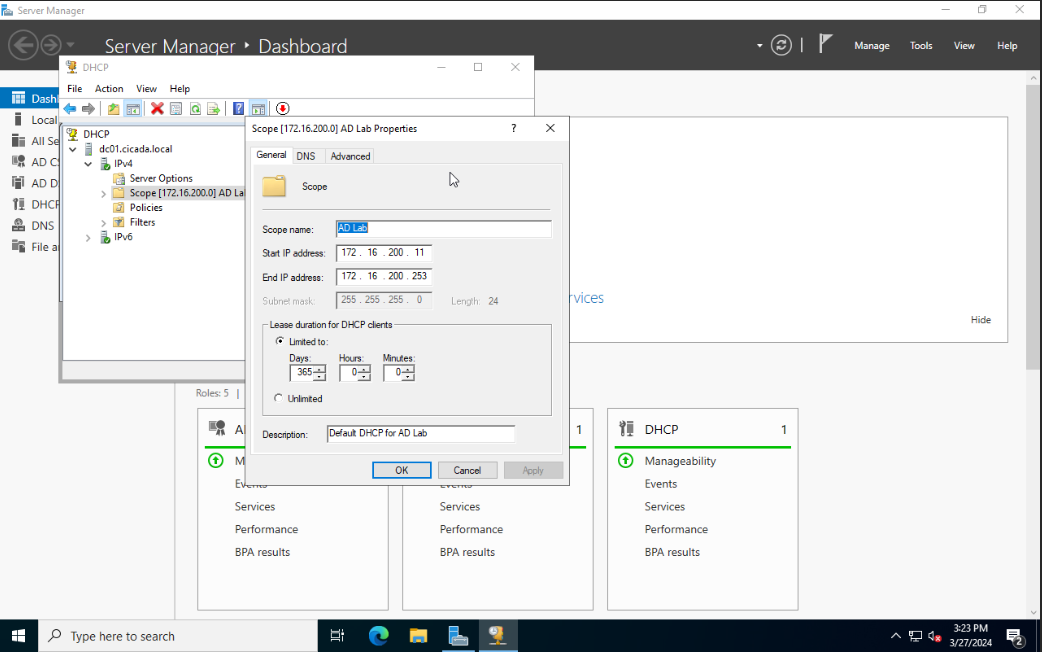
When prompted if you want to configure DHCP options for this scope now, choose Yes, then select Next. You will then be prompted to select the IP address for the default gateway. The IP address we gave our default gateway was 172.16.200.1. Enter that and click on Add. Then select Next.
#
Add Windows 10 VM to Domain
Go through the initial setup wizard and login with the local account you created. The next step is to join the Windows 10 VM to the domain. To do so, open the Settings program and go to Accounts > Access work or school > Connect. In the pop out window, select the option Join this device to a local Active Directory domain. Enter the domain name we used to configure our Active Directory forest (I used cicada.local). You will then be prompted for a login.
Windows 10 will restart after entering the credentials. After rebooting, you can now login to the domain by selecting Other User in the lower left corner.
#
Conclusion
Congratulations! You now have a fully functioning Active Directory home lab. With your Domain Controller and Windows 10 VM set up, you’re ready to explore, experiment, and even simulate attacks to understand how AD environments operate and how they can be secured or compromised. In the next part, we’ll delve into common misconfigurations in Windows and Active Directory and explore how attackers might exploit them. Stay tuned!